Saturday, December 14, 2013

Quick Enchilada Casserole - Marvelous


  •  
  • I purchased the Old El Paso enchilada boxed dinner. 
  •  
  •  Thinking I didn't want to spend the time following directions - I then:
  • Poured  a little sauce on the bottom of a glass pan -
  •  Then cut (or tearing works just as well) the tortillas into small bite size pieces.
  •  
  •  Layer cheese, sauce, meat of any kind (cooked), tortillas until you are finished with the ingredients.   Try to make two layers at least.

  • Another great topping would be Doritos - ummm!
  •  
  • Cook to heat and then enjoy. 
  •  
  • I also make them with a can of enchilada sauce, cheese, green chilies, and corn tortillas. - I figure that they get chewed up anyway - why take all the time to roll etc!  I admit the bowl I served has a bit to be photogenically desired - just cover with sour cream and more cheese - and an olive!
  •  
  • I also use this technique for my Lasagna - it works out perfectly!

Enjoy

Wednesday, November 13, 2013

Zuchinni Art


As always, I look for items of interest to blog about - in today's paper in my area there is a section that shows how to make Zucchini boats - note that I have the market on it ... 

So I decided to look further and find our what else you can do - and here are just two images I found:

With either plan - there is increased interest in the almighty garden queen - the Zucchini.

Thursday, September 26, 2013

My latest Listia Recipes - some old favorites... some I must share... and some that I just cook all the time.

My latest Listia Recipes - some old favorites... some I must share... and some that I just cook all the time.

The greatest!  My reason for coming up with theses recipes was a plethora of zucchini one summer 20 years ago.  Not wanting to let anything go to waste I began to cook everything I could imagine with them- my family loves them to this day - young and old - but then we are a vegetable loving family.  But let me tell you everyone loves it!

Back to the Stuffed Zucchini and Yellow crook neck squash side dishes.  Note: if you use meat in the mix you can call it a main course!

Now you can use either squash for any combination - I think the tomato based fillings go best with Zucchini and the toppings vary with what I have on hand.
 
1st  half the squash lengthwise. 
Pull out the seeds with a spoon (put into compost bin).  Here you can decide to steam them or "par" boil them.  I just cook them as is, in a little bit of water so they don't dry out or burn.  If adding water to the pan do not cover the squash boats!  Pre-cooking will cut off 30 minutes of cooking - you will still spend the same amount of time, try it both ways to see what consistency you prefer.

I like to cut of the tips of the ends - but make sure you have a boat left in the center.

Pour a tomato sauce: Alfredo, pizza, Ragu, or what ever sauce you have to cover the bottom - on top you can add crumbled sausage, bacon, hamburger, or whatever you have on hand.  The topping; is of course shredded cheese.

Before you put in the pan you need to poke a few toothpick sized holes to let them drain.  Bake if not par boiled or steamed beforehand, for 45 minutes - making sure to brown them nicely before serving.  If you have pre-cooked as above then you need to only warm up the toppings and broil the top to a lovely golden brown.


2nd Pic:   This is basically the same but nothing like the first fillings!  LOL   Hold on to your hat as the sauce on this one is mayonnaise... yep and you would never know it.  OK, now here you can add Parmesan cheese, feta, goat cheese crumbles, fresh mozzarella, real Parmesan cheese, Asiago, you get the picture.  I use a combination of all the cheeses I have and add the fresh shredded Parmesan cheese for browning on the top.

Since this original posting I have prepared these dishes dozens of times and am always on the last bite when I remember to take a photo.  Last night it was fresh mozzarella cheese on top and it was sooooooo good.


Monday, August 26, 2013

Newest Recipe: Gouda Cheese Stuffed Flounder in Bacon Wrap

Just what it says!  This was a test recipe that came out perfect and Delicious.  This flounder was from Publix and it was individually frozen in the freezer section with 6 pieces.


  This is not my photo - we have Dinner & A Movie night and this was finished while the  movie was playing so we ate it before I could take a  snap shot!  Of course you don't see the bacon wrapped around and we had mint on our fruit K-Bobs... will take a photo next time.
  • Semi- defrost the flounder - until it was able to roll.
  • Pre cook the bacon
  • Pre cut the cheese into thick rectangles
  • The dip was 1 egg and a little beer
  • The crumbs were simple stuffing crumbs crushed to a fine texture with garlic salt added
  • Rolled and wrapped sealing in place with a toothpick.
  • Dip in egg mixture
  • Roll in bread crumb mixture
  • Saute in olive oil to brown on both sides with onions.  
  • Place in roasting dish, covered 30 minutes
  • Last 10 minutes remove the foil.
Mom who is not a fish eater - liked it
Husband who eats anything after marrying me - loved it
Me?  A SCUBA diver and loves anything from the sea - WOW good fit.

Sometimes I have a  thick rolled seafood and it is hard to tell if completely cooked - fish that I like to play with in the kitchen - flounder, shark, and swordfish - they also BBQ well.  Any other flaky fish is easy to tell as the flakes are completely white and no transparency visible.

Wednesday, March 13, 2013

Pluffy Cheese Recipe

Perrins Pluffy Cheese!
What a man pleaser!  My Hubby's favorite food is a cheeseburger!


I can not believe I did not finish this casserole posting.  The ingredients are the usual for a man food, cheese, meat, sour cream and cheese.... LOL   I am a throw in the sink kind of cook.  As long as you don't burn this recipe you will have a winner on hand.


It is a cheese burger casserole, so think of the type of cheeseburger you like, is it bacon, mushroom, jalapeno, green peppers or whatever?  Add those ingredients to this basic recipe and you will enjoy it over and over.  You can also use sausage . ideas are limitless.  (Don't forget to keep the Pluffy on your new creation though!) 

Note:  there is a way to add vegetables - shredded zucchini is one of my secrets - adding flax seed is another!  What they don't know won't hurt them right?  Or is it: "If it doesn't kill you, it makes you stronger!'"

The collection of Bisquick Impossible pies is incredible - this is an adaptation for one they have in their book.  My favorite is the Coconut pie!   UMMMM  make it for dessert!  The whole idea behind an Impossible pie is that you throw the ingredients together, and during baking it becomes a pie with crust at the bottom!


  • Cheese - 1 1/2 shredded cheddar cheese - or your flavor favorite. 
  •  
  • Hamburger - 1 pound cooked, crumbled (drained of course), seasoned with salt and pepper to taste.  
  •  
  • During last 5 minutes of cooking hamburger -add in 1/2 to 1 cup chopped onions if you like.  (We have to omit these at my house!)
  •  
  • 1 cup Bisquick 
  •  
  • Sliced Tomatoes - or chopped - your preference 
  •  
  • Cooked bacon if you like (Think bacon Cheeseburger!)
  •  
  • Sour Cream - 1 whole container (12 - 16 oz)   blend in milk and eggs
  •  
  • Milk - 1 cup 
  •  
  • Eggs -4 blended before adding with milk and sour cream.

 With oven between 350 and 375 degrees ( mix items 4.,7., 8., and 9) pour into a large pie plate or casserole dish (greased) on top of meat / onion / bacon mixture- bake 20 minutes and then add cheese and tomatoes  - bake until the cheese is melted and there is a little bubbling.  I have also made in meatloaf pans and usually freeze on for later.

I also top with more sour cream, and guess who adds more cheese?    Enjoy!


Saturday, February 16, 2013

Boo Boo Bunny


I thought it was a great idea to share with Listia fans the directions on how to make a Boo-Boo Bunny for free - electronically so no points or stamps needed!  Hope that you fan me and I will fan you back if you leave a comment!


 I used these for holding ice cubes on a tiny finger with a Boo-boo for my children and you may want to also!  ENJOY


Saturday, February 9, 2013

Greek Yogurt Now in your Kroger Stores!


I have tried 4 of the new product lines and 5 various flavors!  I say it gets the Yum Up award!


So these are the new flavors of Kroger Greek Yogurt.  You know I have stated before that I am a BZZZZZZZZZZZZ agent?  Well I get to sample items like these for free as long as I offer up my opinion (e-pinion) on the products!  There really hasn't been a bad item - maybe the pricing is not to my liking, but this is not one of them.  Kroger Private Selection has a great Greek Yogurt - like an adult flavor - separate topping compartment etc.  Now this like of Greek Yogurt is more middle of the road - it is good - it is thick - and it is healthy.  

Shall I quote the Kroger Marketing?  "If you’re looking for a tangier treat, try Kroger Greek or New Greek Lite yogurt. They’re a high source of protein (16g per serving!) with no fat and varieties like Blackberry Yumberry and Lemon Crème. And with the Greek Lite packing just 90 calories, you can afford to sample every delicious flavor."

Now the vanilla drink caught my eye on this picture:   

Reading a bit more about the Carbmaster product line :

"Introducing another way to enjoy CARBmasterTake a trip over to the milk aisle and treat yourself to Kroger’s new CARBmaster milk drink — it has the same per-serving nutrition as the yogurt you’ve just fallen in love with. A nonfat, reduced sugar milk drink, it’s deliciously low in carbs and packed with 11g of protein per serving. Also available in Vanilla, they’re a yummy and good-for-you option you and your family will love. Look for CARBmaster milk drinks exclusively at the Kroger family of stores."
  

How to propagate Rhizomes from a bearded Iris


Thank you for taking care of our planet!  If you are not aware – a rhizome is like a potato – you can plant an “eye” and get it to grow to full size.  These rhizomes are segmented so you can cut at the joint, leave together, or separate by cutting in to lengths of your own.  Be mindful the area that is cut is open to invaders!


Rhizomes – Irises are the probably the most common form of rhizomes and will be used as the example.
Step 1. Carefully, dig up the Iris rhizome using a hand trowel.  Shake off the excess soil.  This should be done when soil is dry.
Step 2. Remove any dead (dried) leaves and roots by gently pulling them away from the rhizome.  If they do not pull away easily, cut them at the base with a clean pair of scissors. 

Step 3.  If multiple rhizomes have formed, pull them apart gently.  If they do not pull apart gently, then they will need to be cut as shown later in the section.

Step 4. Place a small amount of rooting hormone with a fungicide** in a zippered storage bag.  Place the scales in the bag, zip the bag shut tightly and shake the bag to dust the scales with the mixture.


Step 5. Some of the larger rhizomes have 'eyes' similar to a potato as shown (pencil is pointing to it).
Step 6. Cut the rhizomes into sections making sure that each section has at least one eye.
Step 7.  Cut the leaves with a pair of scissors leaving one inch of leaves remaining.
Step 8. Holding the rhizome inside the bag, shake off the excess powder, then remove the rhizome from the bag (wear rubber gloves, preferably disposable ones).

Step 9. Your new rhizomes are now ready to plant back outdoors.  Be sure to space them at least 6-8 inches apart to allow for growth.
The live roots should be buried, but the top 1/4 inch of rhizome should remain above the soil.  Water lightly.


Friday, January 25, 2013

What a wonderful page! Click and e-mail for free items and /or coupons direct from the Manufacturer


 This is a great find for the coupon-er.  This website provides the food company information so you can get manufacturer coupons with just a click and a kind note.  Just go to the site and find the contact tab.  I have done this twice before, from my own list, and enjoy the rewards of letting various companies know my opinions on their products in exchange for coupons.  In fact one day I went through my cupboards and wrote down the name of all the companies  and wrote them a letter! 

http://www.livingrichwithcoupons.com/got-coupons-master-list


Adorable No-Sew hat from All Parenting Magazine

 I just had to share this link.  This hat is a no- sew project and so incredibly easy!  Follow the link below and look at the easy directions for this adorable Hat!  


I may make a pair for the twins and an older brother that I  know.

 http://www.allparenting.com/my-family/articles/966733/homemade-no-sew-fleece-hat-for-kids

Yak Hats Wool Trapper Hat (Google Affiliate Ad)

Planting your broadcast seeded flowers!

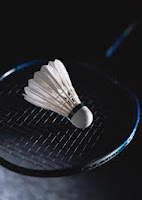
Broadcast flower seeds are those that resemble a badminton ball.  The flare area is the "sail" for the seeds.  These are meant to be released into the wind and "broadcast" over a wide area.  What makes these so easy to sprout is that you mix them with a good potting soil or garden mix and just broadcast them where you want to grow.  Remember that when they seed after blooming they are going to open up and "broadcast" all over your yard!  These are hardy, beautiful, and easy keepers.    I hope you enjoy your flowers.


Wednesday, January 9, 2013

Start your Hisbiscus Seeds Tips

Seed start tips!


  • Cut off the top third of the plastic soda bottle using a sharp knife. Set the top portion of the bottle to the side temporarily, making sure to retain the lid on the bottle.

  • Fill the bottom of the plastic bottle half full with good potting soil.  Dampen the soil with water, ensuring that the soil is moist throughout the bottle. Do not leave any of the potting soil dry.
  • Place three or four hibiscus seeds on top of the soil and lightly cover the seeds with wet paper towels.  If desired, shred the paper towels prior to laying them across the seeds to keep the paper towels from being too heavy.

  • Reattach the top and bottom portions of the plastic bottle with the duct tape. Do not remove the lid from the top of the bottle. Place your terrarium in a cool, dark area. Allow the seeds to germinate. Typically the seeds will sprout within a few days.

  • Remove the smaller, weaker plants from the terrarium once the seeds have sprouted. At this point you should discard the top portion of the plastic bottle. Allow the sprouts to continue to grow in the bottom portion of the 2-liter bottle for at least another 3 or 4 weeks so that they can become firmly established and viable plants. Provide the newly established plants with enough water to keep the soil in the plastic bottle moist, but do not over-water the plants. To avoid drowning the plants, use a spray water bottle to add the water to the soil.


I found this idea and think perhaps it is a great idea to add to the above!  This  project makes starting or growing plants a whole lot easier by automatically keeping the soil at just the right moisture level. All you need is a 2 liter bottle and some string. Basically, you cut the bottle in half, and thread some string or yarn through the bottle cap. Then invert the top half into the base and add your plants and soil.
The yarn acts as a wick and the plants will take the water as they need it. Even better for those of us with black thumbs: The clear bottles help you see when the water needs refilling.

Planting Tips:
  • Place the Texas star seeds in a small bowl and cover them hot water.   Allow them to soak for one hour.

  • Choose a sunny garden location in which to plant the Texas star hibiscus seed. A planting area that provides all-day sun and shelter from high winds is ideal.

  • Amend the soil by mixing in a 3-inch layer of good  compost to a depth of 6 inches. Rake the seed bed so that it is level.

  • Place the seeds on the surface of the soil and cover them with a 1/2-inch layer of sand.
     
  • Water the seed bed until the layer of sand is moist, and keep it moist until the seeds germinate, which should occur within three to four weeks.

Tuesday, January 8, 2013

Recipes for the Best Baked Zucchini!


Recipes for the Best Baked Zucchini!
I have to say in season, these are very economical to bake and look how you can get everyone to love their veggies!

 1.   Red sauce, sausage, and cheese

Cut zucchini in halves lengthwise. 
Use a spoon to scrape out seeds making a boat in the middle of the squash. I make a small hole in them with a toothpick to drain.


I add Pesto to the tomato sauce (spaghetti sauce usually) and then I pour a little on the boat, add some cooked sausage crumbled, and then cover with Feta cheese, shredded cheddar cheese, or shredded Monterey jack cheese.
I bake these in a glass pan with a little water under the zucchini, just until soft.  Test with a toothpick to see how soft, do not puncture the boat.  This water bath helps the dish cook quicker.

You can also mix in bread crumbs or sprinkle on top.

2. White sauce, stuffed zucchini


 The second recipe is for a mayonnaise-based topping.  As stated above prep the zucchini and the baking dish.  Place into these boats: mayonnaise  and shredded Parmesan cheese; or just sprinkle from a can over the top.  The taste is amazing…. yummy

PS they do not store well - the squash gets mushy! 

As an afterthought - you could cut them into chunks and make a casserole - I think I will try that!  I will try freezing it to see how that works and post later.